A lot of the fun of this hobby, when related to photos and photo showing, is experimenting and trying new things, and the following satisfaction when one of those ideas pays off.
Sometimes, it is difficult for people new to the hobby to figure out these tips and tricks, without directly asking, and-- let's be honest-- it can be very intimidating to do so.
I present the following article as a quick, easy guide for one aspect of photos- footing. This particular article pertains to micro minis, which can be either very easy or extremely frustrating.
There are two main things you need to look for when picking footing:
1. Scale.
Dirt
My first suggestion is to look at real horse photos and study how large the particles of the ground are in comparison to the horse. Here we have an Arabian horse in a show ring in Arizona, and the dirt has been kicked up behind. It can be hard to see, but that's the point. The particles- each and every piece of dirt- are tiny relative to the horse. (Since we are talking about such a small scale, I've made every photo as large as possible so we can see detail, so please bear with me if you're on a slow computer).
 |
| Photo copyright Courtney Gearhart 2012 |
That poses a problem for owners of the micro sized models. If we are striving for realism (and that is the point, isn't it?), then the particles for our dirt must be microscopic!
My first suggestion is ballast. This stuff can be found online or in any good hobby store. It is often found in the model train/scenery section, and is relatively cheap. It comes in fine, medium, and coarse grain. The two above are both fine grain, but hopefully you can see that even the dark brown particles are a bit larger than the tan ones.
 |
| Fine grain ballast |
Here is the tan fine ballast in practice. It is small enough to not detract from the model, and the particles are almost small enough to not be seen.
+show.JPG) |
| Ballast at work |
Another option that is commonly suggested is cinnamon. Here is an example:
 |
| Cinnamon |
A third choice might be corkboard. It provides a level, solid surface, and actually makes passable dirt!
 |
| Corkboard |
If you don’t have a hobby store close, most Walmarts carry a type of sand in the decorative aisle with the fake plants and colored rocks.

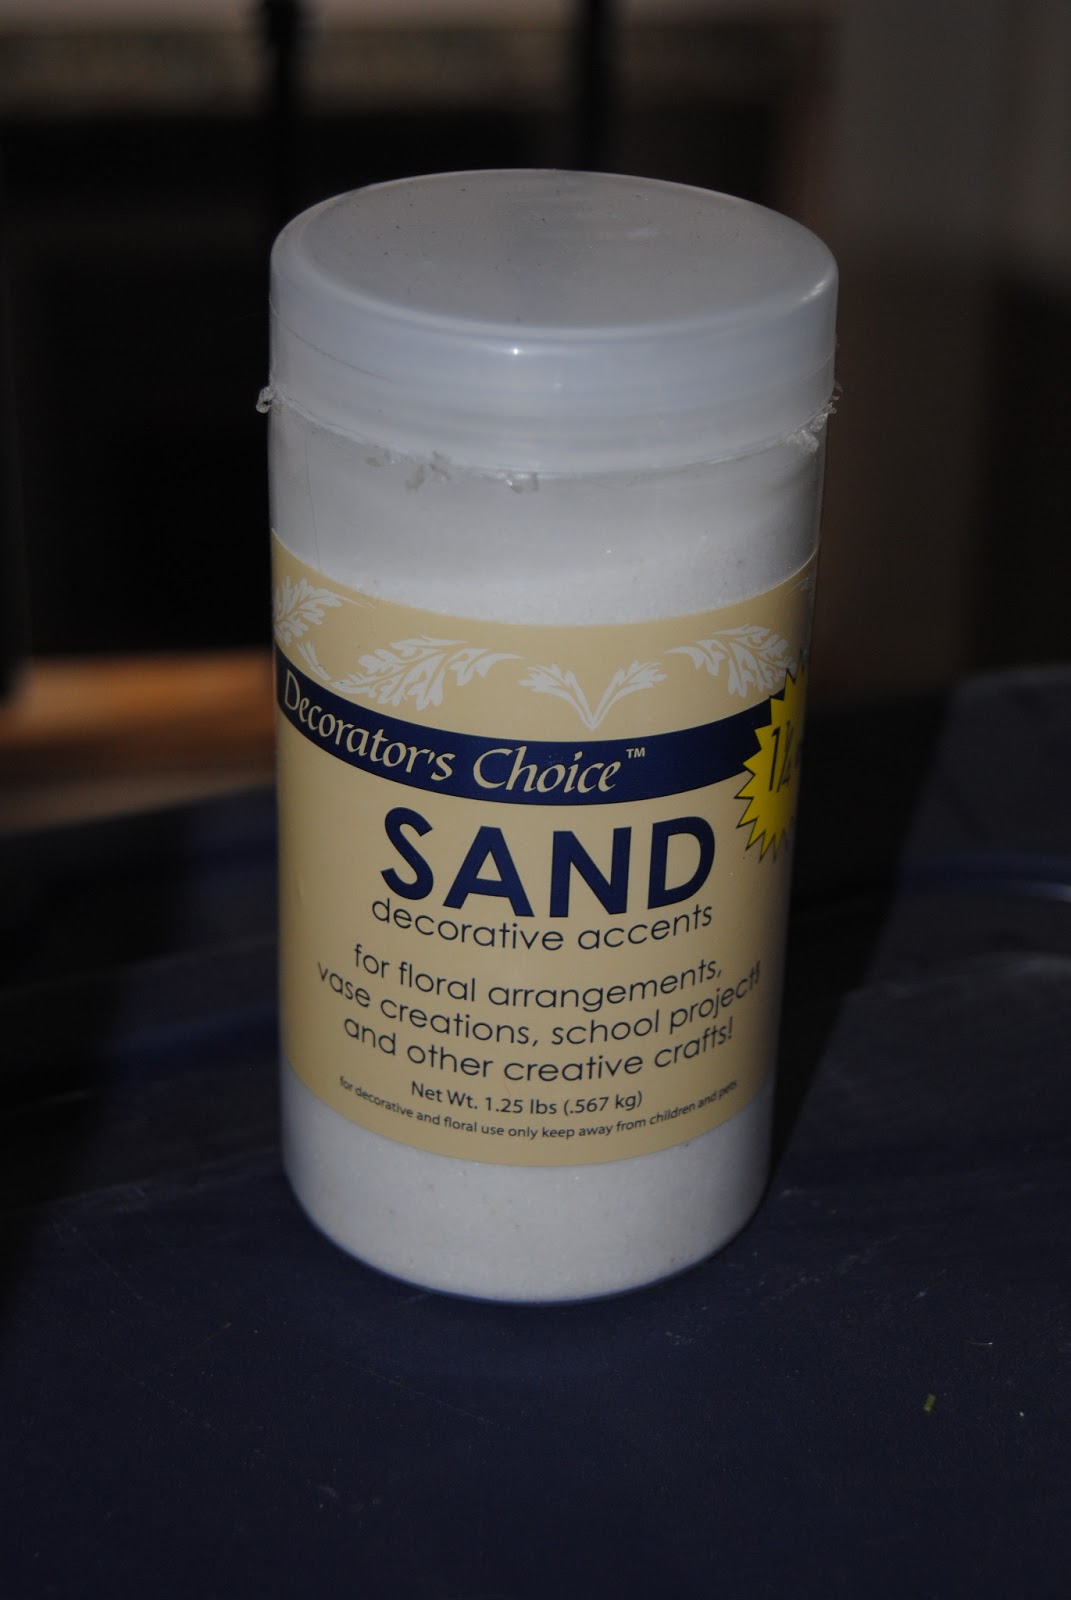
The color choices are less realistic, but the white sand makes decent snow! For the yellow, think beaches or desert.
 |
| "Snow" covered field |
I also found these at my Walmart in the same decorative section:

Again, the white works well for snow or an exotic beach, but the one on the left is too large for minis, and maybe even too large for SMs. It would work well for Classics or Trads, though.
If you don't have the money or simply don't want to pay for dirt (understandable), then there are plenty of places you can get some. Playground sand can be found at (where else?) playgrounds, or bought for a huge bag for only about $4 from Home Depot. It is a bit more difficult to achieve the desirable scale using this stuff, as most of the grains are large. However, I have poured some on a table and let it sit outside through rain and weather, and the larger, heavier particles naturally settle to the bottom, leaving patches of fine particles on top in some places. Below is an example

To the left of the picture, you can see a group of large pebbles typical in playground sand. However, I set the model on top of one of the "sieved" parts of my table. This process can work with any backyard dirt as well. A good wetting and a chance to settle can create a smooth surface of fine particles for your smaller models.
Grass
Scale is relative to depth. A grass that comes up to the model’s knees is not going to work for a halter photo, nor a good pasture one. In real life, cropped grass only reaches partway up the hoof. Anything higher is passable as “wild” grass and would work for mustang photos or outdoor events like trail rides.
Two products I’ve found that work well are Static Grass Flock, again found in hobby shops in the model section. This stuff is a bit more expensive, as you can see. It clumps together well, and can be teased up into strands like blades of grass.
 |
| Static Grass Flock |
 |
| Grass mat |
Here is an example photo using the grass mat:

The hooves are *more* visible, but at least they're not totally obscured.
2. Depth
 |
| Photo copyright Courtney Gearhart 2012 |
A way to avoid this is to take a piece of cardboard and spray sticky spray or spread a thin layer of rubber cement over it, then pour your ballast/dirt over it, and dump off the excess. Here is what mine looks like:
 |
| Cardboard with glued on dirt |
It is okay if there are some spots with missing dirt. When you get “at level” with the horse, you can’t tell. Here is a photo using that exact cardboard piece:
 |
| Using the sprayed cardboard |
Otherwise, you may end up with a situation like this:

Not only are his hooves hidden, but also part of his leg!
Check back next time for a discussion on tips and tricks to achieve believable bushes, leaves, and other additions to your scenery!
No comments:
Post a Comment